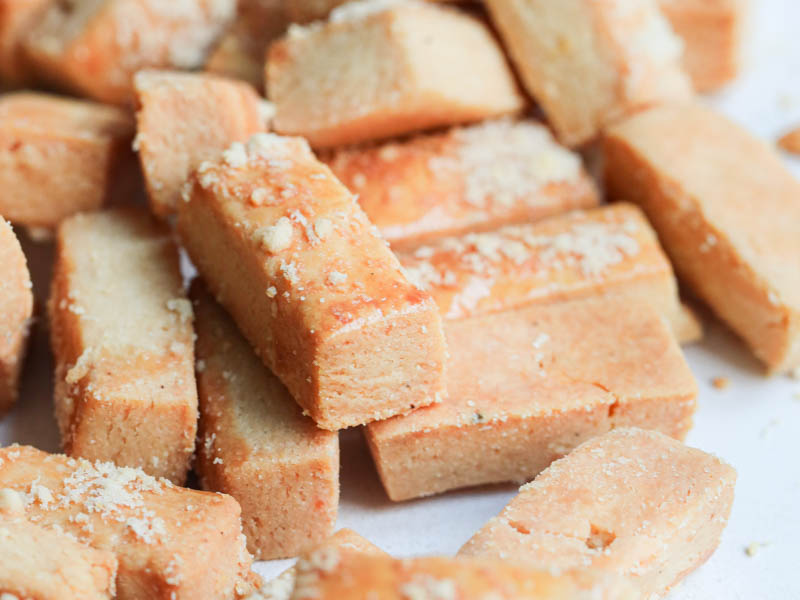
Pão de queijo
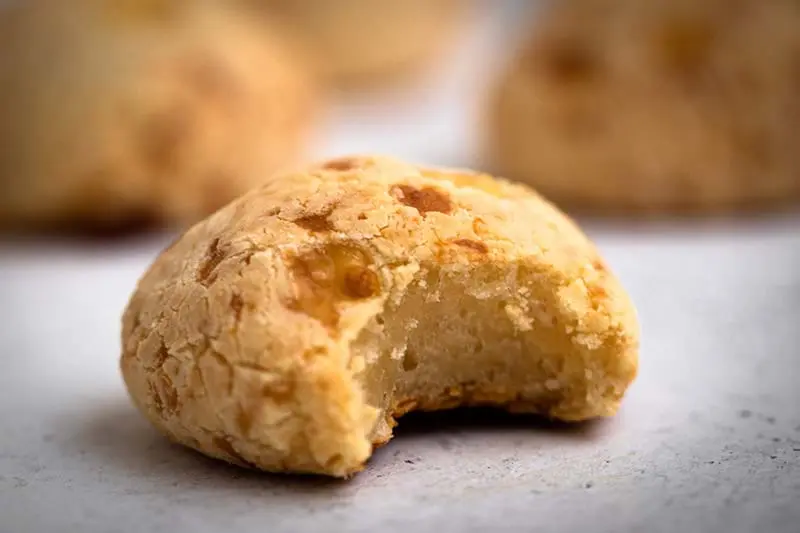
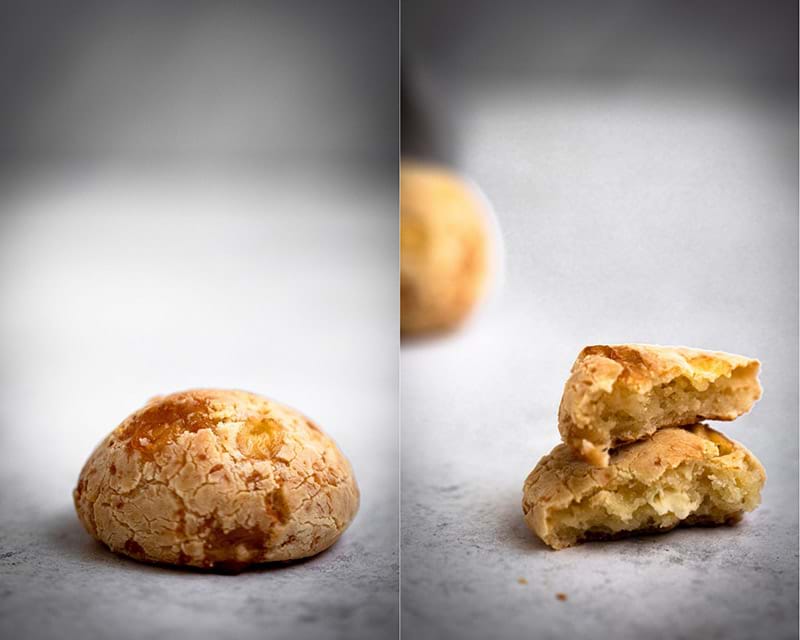
Little gluten free cheese breads. To be eaten when still warm.
Belula
March 12, 2020
April 06, 2020
I've been wanting to post a pão de queijo recipe for as long as I can remember. But it isn’t easy finding cassava starch (almidon de mandioca in Spanish) that the recipe calls for in Paris, so I kept postponing. I then realized Amazon would be a good place to look for this ingredient. And bingo! I found it!
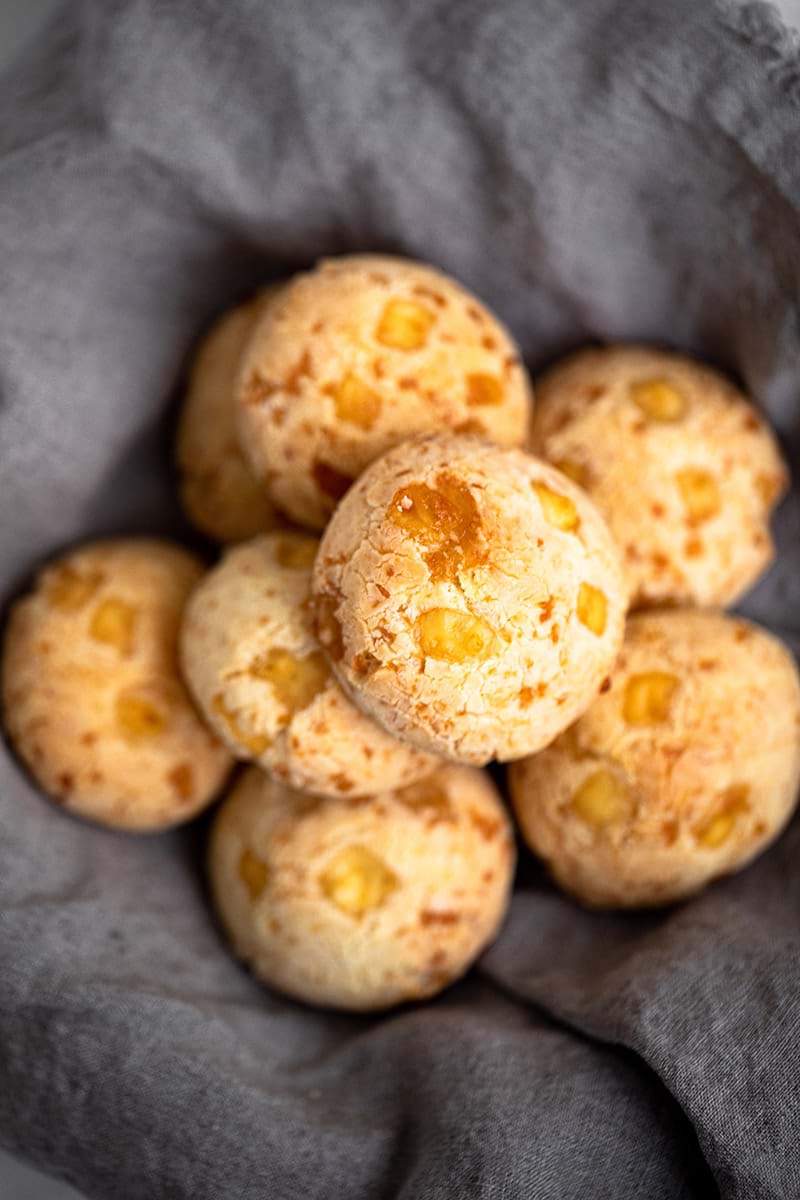
This little cheese bread balls will rock your world. They are gluten free, not diet though :). They are easy to make, they are tasty, people love them, you must eat them as soon as they leave the oven (so nothing about the waiting to cooldown nonsense!). Also, they are fluffy and will melt in your mouth. So, no excuses. You need these in your life.
A little history. They come from northeastern region of Argentina which limits with the southwestern border of Brazil, so naturally we make them in both countries; in Argentina they are called chipa and in Brazil known as pão de queijo. Either way, they are the bomb! There are probably a million different recipes and variation for this perfect appetizer.
My version is inspired by my friend Lucia's grandmother recipe. She obviously comes form the province of Corrientes, the center of "Chipa" region. The kind of cheese you use will depend on what you can get wherever you live. If I were in Argentina I would use "fontina" and "cascara colorada". But because I'm in France I adapted to cheeses I could find here and ended up using 4 different kinds. You can test and investigate and make them your own using the cheese you like. The hard cheeses though, not the soft ones like brie and company.
My friend told me her grandma used to make them using lemon zest, because it gave them that extra special taste. And I agree. You can still not use the lemon and they will still taste heavenly.
Remember they are meant to eat warm. Make them before hand and only bake them when it's time to eat them. It only takes 20/25 minutes. The baking time will also depend on the size. I made them quite large, but you can make them one bite size and serve them as appetizers. This is how I usually make them. And if you make the whole recipe, then that's a lot of pão de queijo, I recommend you make the whole batch and then freeze whatever you are not eating. You can put them in the oven directly from the freezer. You are set for any emergency and last-minute guests.
The ingredients used in all recipes on this site are measured using the metric system. I use a
scale to be precise with my measurements and ensure good results. If you would also like to use a scale, here are some:
USA,
Canada,
UK,
Australia,
France.
Subscribe to the newsletter
Prep Time: 30 minutes
Cook Time: 25 minutes
Total Time: 55 minutes
Servings: 28 pieces
Nutrition: 163 cal
Cuisine: Brazilian
-
Gouda Cheese
150 g
-
Eden Cheese
150 g
-
Parmesan
100 g
-
Comte
100 g
-
Butter
(unsalted)
80 g
-
Eggs
2
-
Salt
5 g
-
Lemon Zest
0.5
-
Milk
160 g
-
Casava Starch
500 g
- 1. Pre-heat the oven to 170 degrees Celsius. Line a baking tray with parchment paper.
- 2. Cut the all the cheese into small cubes. You can also grate them or shred in a food processor. Set aside.
- 3. Melt the butter and mix with eggs and the salt. Warm the milk and set aside.
- 4. In a bowl put the cassava starch and the lemon zest and make a whole in the middle. Pour in the butter/egg/salt mixture and using a spatula mix in the starch into the eggs slowly.
- 5. Now add ½ of the cheese and ½ of the milk and continue to mix slowly. It will become harder to mix once you add in the cheese. Hang in there, the dough will come together. Add the other half of both ingredients and continue to mix with the spatula until there is no more apparent liquid.
- 6. Now you can finish working the dough with your hands. After a few minutes it will come together. Don't add extra liquid even you are tempted and think that you are never going to get a nice, shiny, uniform dough. You will.
- 7. Once you have divided the dough into 4 pieces. Roll out each piece into a cylinder of about 3 cm in diameter. Now divide the cylinder into 7 equal parts.
- 8. Note: This is where you decide how big you want to make your pão de queijo (or how little!). You can totally make double the amount. So at this point, when you roll out the cylinder make it a little thinner and then cut out 14 pieces instead of 7!
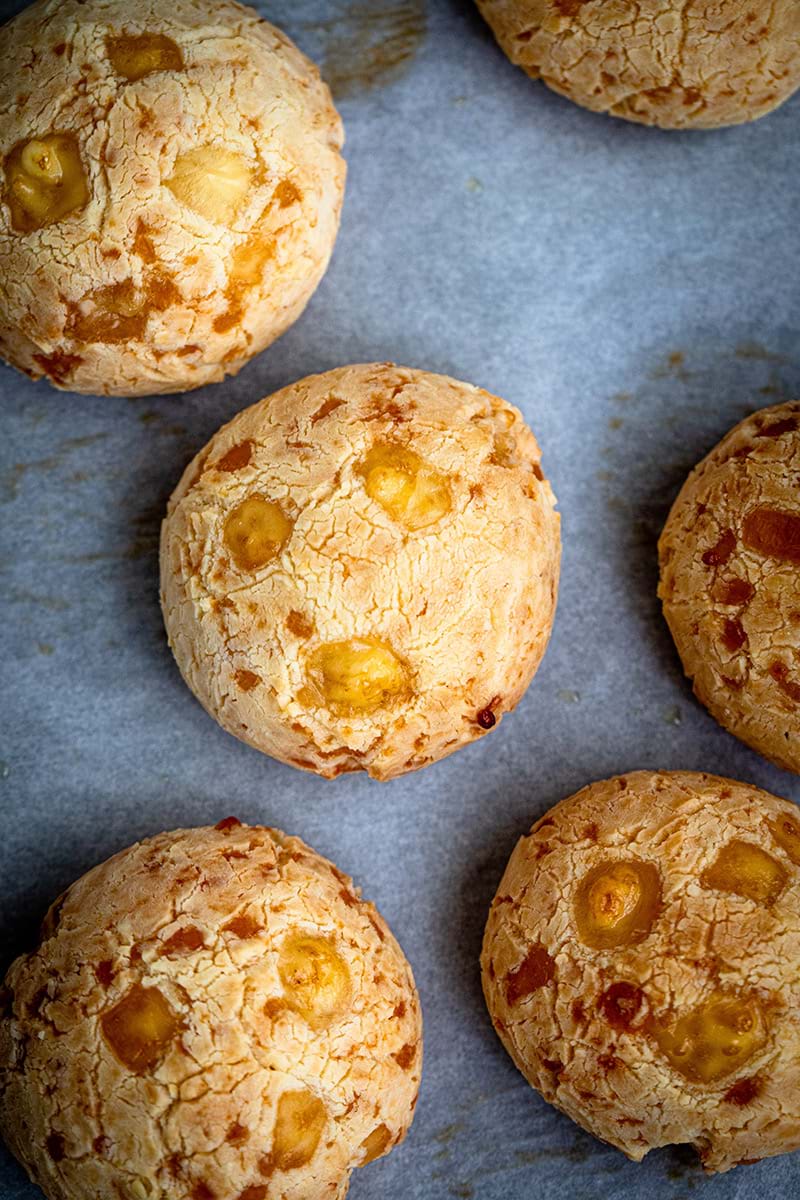
- 9. Make little balls out od each piece. Transfer to the baking tray you just prepared living space between them because they gain volume in the oven. We don't want them to stick together.
- 10. Bake for about 20/25 minutes or until golden. Not too golden though. We want them to be super soft so that the cheese melts in your mouth! Overcooked, they tend to harden. Beware.
- 11. Note: If you made them smaller it will take a lot less to bake. So, look out. And as I always say, each oven is different, so time is an approximation. Get to know your oven and write down the baking times, so next time you don't have to be standing next to it while you bake these beauties. This works for all oven recipes.
- 12. About freezing: the cheese breads you are not baking right away you can freeze on a baking tray, and once they are hard transfer to a Ziploc or different hermetic container. Tray in freezer might not be the best of ideas!
- 13. Don't let them cool down and eat them right away.
If you made this recipe I would really appreciate it if you leave a rating or comment below! Also, if you share on social media please use #cookwithbelula, I would love to see what you create!


Dear Belén
I haven't made this, but just thought I'd let you know how much I enjoy your website and recipes. It's new and interesting and when I visit, there's always something that I would love to try out. If I can just find the time...
Thank you very much!
Hi Emily,
Thank you so much for this lovely message. It truly made my whole day and definitely made this new week brighter. I appreciate it!
I'm so happy you enjoy the website and the recipes!!
Thank you for your kind words!